Become a "FRIEND" on Facebook, search for me - "Leslie Crafter"


Monday, August 31, 2009

Just too cute not to share...

I found these adorable Wizard of Oz clips. Don't know what to use them for, but I knew I had to share them. The .svg files are in the right hand column. Let me know what you might use them on.

Sunday, August 30, 2009

Halloween Luminaries


I need to donate a craft for my church's Harvest Fair - they will sell them. I didn't want to do anything too expensive on my part. I came up with halloween luminaries. I used orange gift bags and black vinyl. They glow so beautifully. I will package them in 6 mixed designs together.

You could also use black paper and glue the design on if you don't want to use the vinyl, but I figure these are reusable as well because the bags are pretty sturdy. You could also use white or kraft bags.

To expand on this idea, they would be great for an evening wedding with wedding bells or a monogram on them.
I also thought they would be cute to spell out a word like B-O-O, one letter on each bag, or anything for that matter

Saturday, August 29, 2009

Are you smarter than....


Here's the latest addition to the drawer full of iron on vinyl t-shirts. My son loves his shirts and gives me great inspiration to make them. We were watching "Are you Smarter Than A Fifth Grader" last night and he came up with his own version.


Friday, August 28, 2009


I decided to make a new door decoration/plaque. I used a pre-drilled pressboard. I covered it in vinyl and then put the design on. It has grommets glued in the holes for a finishing touch. It hangs by a leather cord. The owl cut is below. (.svg)
I created the multi color cut by cutting the owl twice, once in blue and once in brown and then piecing it together.


Tuesday, August 25, 2009

Halloween Shirt


I've been wanting to make a cute Halloween shirt. Made with heat transfer vinyl again.

Front of shirt (top photos) Back of shirt (bottom photo)


here is the .scut file (SCAL 2 only - Sorry)


http://www.mediafire.com/file/ytmmmtonqon/witch school2.scut

Saturday, August 22, 2009

Halloween Goodies


There are some great Halloween ideas out there, and it got me starting to think spooky and scary. Here are some great images for you to cut with SCAL. The .scut cut files are below. Please be so kind to leave a comment if you are going to download these.


Wednesday, August 19, 2009

Aaargh! A Pirate shirt it be!


I just made this shirt for my son. It came out great, my favorite so far. I use the iron on vinyl (heat transfer vinyl) from H&H Sign Supply. This is the Siser Easy weed. Directions for circular text are in the next post. The font is called Primitive.

FRONT OF SHIRT


BACK OF SHIRT

The .scut file for the front of the shirt is here:
Basic iron on vinyl directions:
Set up your design in reverse - use the flip function to reverse designs - to flip text, see several posts below on this...
1. Cut with the shiniest side down about 3-3-3 for the settings works
2. Weed off your extra vinyl
3. Place your design on your shirt with the adhesive side down - your design will appear correctly now - your decal is sandwiched between the clear backing and the t shirt.
4. Iron on cotton setting - pre heat well
5. I use parchement paper over the design to protect the shirt.
6. Press and hold firmly on design for 6-8 seconds, then move iron around for about 20 seconds
7. Allow decal to cool and peel
Of course these are general guidelines, because fabrics, irons, and materials vary, so can your results.

Just giving you directions on circular text again

I love the circular text. Here is how I did it.

1.You need to have a picture editing program on your computer - I use Paint.NET (This is not the Paint Pad Accessory which is on your computer). You can download this free program - you should have this, its great - from `PaintDotNet.com`.
2. Go to Microsoft Word.
3. Click Insert, Picture, Word Art.
4. Click on one of the plain black styles in the top row. Type in the text you want. Click OK.
5. Click once on your text. The Word Art box will appear. Click the "A" which looks italic. (It's in the middle of the toolbar).
6. Click on the circle icon.
7. Now right click on your image, and click on Format Word Art.
8. In the Layout Tab choose "In Front of Text". Then click the Size tab and type the same number in the height and width (for example 6 and 6) Then OK.
9. Now right click again and click Copy.
10. Open Paint.net. Click Edit, Paste - then Expand Canvas.
11. Now you can save your file. Click File, Save as - make sure to change the file type to .jpg.

Now you can use this file in SCAL

In order to use circular text with an iron on, you will have to flip the text in Inkscape:
You will have to follow these directions if you want the item flipped.

Open Inksacpe, Click File,Import - find the .jpg file you just created
Once it is in the window, click Object, Flip Horizontal. The click File, Save As, and type a name (I usually make the name the JPG name and "flipped" , so I know which file is the flipped file).

You now have an SVG you can cut with SCAL.

Open SCAL, then Import SVG and find your file -resize if necessary and cut.

Monday, August 17, 2009

SCAL 2 Making Iron Ons

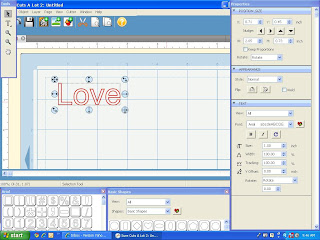
SCAL 2 is definitely much easier for flipping the text for making iron ons. A few posts ago, I gave directions for settingup text for iron on vinyl. (These apply if you have to use SCAL original or DS) These directions and pictures apply to SCAL 2 only. My goodness it is soooo easy, one click. Simply type your text normally (pic one) and then click the flip horizontal button (pic two) and you're done!!


Friday, August 14, 2009

You've got to be kidding!


Nope, vinyl nail decor - it's great - it lasts through everything. Don't look at my hideous pedicure though.

Tuesday, August 11, 2009

OMG! OMG! I made the Chirp Newsletter


I can't believe I was mentioned in the CHIRP Cricut Newsletter.


Here is the link to the post that was referenced there.


I made this with the heat transfer vinyl. I buy mine at H&H sign supply. They have some great colors. I've used all of the brands they carry. This particular shirt is made with the Siser.


Easy directions - make sure to flip any designs you do - the iron on vinyl you do in reverse. Also see my blog entry on setting up text for iron on. Cut and weed your design, then once placed on, I use parchment paper over it. On the cotton setting of your iron, place iron firmly on the decal - hold and press hard a full 6-8 seconds, then gently start moving the iron around for about 15 more seconds. Most iron on vinyl is cold peel, so wait at least 45-60 seconds before puling off the backing. (always follow the directions according to the specific vinyl you use). Then you're done! Wash and dry normally.


Tips:

1. I don't do this on very humid days

2. wash and iron your garment before doing this

3. It is hard to start the weeding of the vinyl - use a fork or craft knife and just nick the corner of where you are trying to weed, it makes starting the weeding easier

Friday, August 7, 2009

Vinyl placemats


I whipped up these quick placemats for our kitchen. Got the placemats at Walmart for cheap (.75 each). I made 3 identical ones for our table. The font is Garton. The silverware .svg is to share below.