Become a "FRIEND" on Facebook, search for me - "Leslie Crafter"


Tuesday, December 23, 2008

Obama Ornament


Here is my version of a keepsake 2008 ornament. I used SCAL to sut the Obama silhouette from vinyl and placed it on chipboard.

Wednesday, December 17, 2008

My Cafe'


I thought this was a great kitchen decoration because we drink lots of coffee...The SCAL cut file is on the right.
I used brown glossy vinyl for the main cut and the hearts are dark red wall pops. Our kitchen is dark red, so it is perfect...

Sunday, December 14, 2008

Super Simple vinyl votives


I love this simple, but elegant gift for a friend. I did the letters in brown vinyl so they would go beyond the Christmas season. The font is Plantin, and the branch is welded from Home Accents. The glasses I got at a thrift store.

Tuesday, December 2, 2008

I just HAD to Vinyl it...


I found these hard sided notebooks at the dollar store and immediately thought that I just HAD to vinyl them! I just love the plaid combinations they come in! The notebooks look small here, but they are a full 81/2 x 11!

Glass Etching - unofficial instructions


So many people have asked how to do glass etching, so here are some basic instructions:

materials needed:

glass item ( plate, glass, tumbler, jar)

Armour Etch creme

vinyl or contact paper

**Armour Etch can be purchased at Michaels and other craft stores, it is pricey, so make sure to use a coupon.

**I find great glass items at thrift stores and dollar stores. You will want to start your first project on an inexpensive item, since you may make a mistake on it. You can even practive on a pickle jar or old wine bottle.


**The best and easiest items to etch are perfectly vertical, like a tumbler glass (or pickle jar). Bulbous wine glasses and vases take more practice, in my opinion.


Here is a cut file with instructions on how to use it. The cut file is in the right hand column


Piece A: rectangle
Piece B: ring
Piece C: inner circle
Pieces D: letters

Choose either negative or positive images. Below the black represents the vinyl pieces and the white is the glass.


The top image uses pieces A & D

The bottom image uses pieces A & C


You get different results from each method.

(These are cut in Plantin, but can easily be recreated in other fonts and shapes)


After cutting, place the vinyl on the glass, make sure it is on where you want it and then press hard on each piece of vinyl making sure you have no bubbles. This is an important step.

I use a foam brush and put the AE (Armour Etch) on with a dabbing motion. You so not want any brush strokes. Make sure you use plenty of the AE - glob it on!


Set a timer for 5 minutes.


When it is done, I use my same foam brush and wipe off the AE into a small bathroom type paper cup. (Put this excess back into your bottle, it is fine to use again!)


When most of it is off, rinse the glass under water washing the rest off. (Make sure you don't have other glass dishes in your sink)


remove your vinyl stencil (you can use it again) and dry your item


Sunday, November 30, 2008

Glass Ecthing


Oh, I just love finding a new craft. Here are my glass etching projects.

I used the vinyl and glass etching creme. It's so fun and makes great gifts too!! I've been searching the thrift stores for cheap glass items to etch.

Christmas Home Decor


I've been having fun with Wall Pops vinyl. I decided to try dome home decor. The cut file is on the right ("Believe"). The text is Plantin, the stars are George, and the sleigh is PDDU.


Tuesday, November 4, 2008

The Bug Mug


I bought this travel mug at my dollar store (Dollar Tree). They come apart and you can put any design or picture inside the mug so it shows through...so naturally I had to make a Bug Mug! I bought a dozen so I'm sure I'll be making personalized or monogrammed mugs for gifts, and themed mugs for teachers - all with my Cricut of course... --The bug head cut file was originally Jen C.'s (I think) I changed it to work with the carts I had. I'll post the cut file here, but please know it is not my original cut file- I'm not taking credit for it...My version uses Home Accents and Wedding...

Monday, October 27, 2008

Gingerbread House


I'm not in the Christmas mood yet, but just had to make this gingerbread house cut. My Mom makes a super fancy gingerbread house every year, and this reminds me of it. I used George, Plantin, Doodlecharms, and Mickey and Friends for the lollipops. Cut file is in the right hand column. Enjoy!

Wednesday, October 22, 2008

Smiles all Around


Here I go again, I totally "craft-lifted" this idea from G&GsMommy. My friends 40th birthday is today and she's having a 60's party, so I thought the smileys were so appropriate! The flowers are just print outs of a clip art flower with a smiley face I put on top. CLICK PIC FOR A BETTER VIEW.

Directions: Find a styrofoam ball which fits snugly into your container. Use hot glue around the edges to hold in place if necessary. Gather lollipops, straws (cut in half), wooden BBQ skewers, clip art, or other decorations(taped to skewers), 3" squares of tissue paper. Start at the top and put in your topper (the item you want to be the centerpiece - in mine the "40 Sucks"), you can work around that now. Take one piece of tissue and put the lollipop stick in the middle being careful not to puncture the paper. Gather the paper gently around the stick and insert the whole thing in the styrofoam. Go around the bottom edge until all is filled in. You can put them 1 inch or less apart. the tissue will cover any showing styrofoam. Keep filling from the bottom of the ball to the top. When you are about 2/3 done, switch to BBQ skewers with the same method, except use a skewer insted of a lollipop. Now put straw pieces over all the skewers, now stick lollipops in the straws. Trim straws as necessary to adjust height of pop. The straws add height and dimension to the bouquet. You can certainly do with out the straw method and just do all lollipops though. At the end stick in any embellishments. Let me know if these directions helped. Good luck!


Friday, October 17, 2008

Pixie Sticks Bouquet


I totally "craft-lifted" this idea from BettyBees Buzz blog. Hers are very cute and I had to try it. I cut from the PPDU card and stuck them to the sticks with pop dots like Betty. For the ghosts and trick or treat bag, I used the Cricut markers first, for accent. I like the clear jar, so you can see all of the pixie stick colors! Click picture to get a better view...

Thursday, October 16, 2008

Tinkerbell Crazy


I didn't realize everyone was so Tinkerbell crazy. Here are some black and white sketch images which you can save, print and use like rubber stamped images on cards and such. There are a total of 7 images to downlaod. If you care to have these images, please be so kind as to leave a comment on this post. File is in the right hand column to download the images. Enjoy


Wednesday, October 15, 2008

Trendy T's


I used inspiration from all of the trendy T's in all of the stores and made a set of T shirt cards. I thought they would be perfect for a "tween". I might even use them myself. I used the onsie cut from the New Arrivals cart and just cut the bottom part off (The white T part is 2.5 inches high and the shadow is 2.75 inches). The shirt logos are from Me and My Big Ideas - jelly stickers. Let me know what you think by leaving a comment on this post!

Saturday, October 11, 2008

Obama campaign logo


This logo looked really simple to make with George, so I gave it a shot. The cut file has all of the colors and cuts on different tabs. Cut file is in the right hand column.

Thursday, October 9, 2008

Halloween Lollipop Tree


Here's a Lollipop Tree I created with Cricut. Used PPDU for the shapes and BC for the text. I made it with a styrofoam cone, tissue paper, wooden skewers and lollipops (about 65 minis). Click the photo to get a better view. Let me know what you think!


(Here are more detailed directions: gather cutouts and tape to sticks. Cut tissue into about 4-5 inch squares - you can cut about 10 layers at a time. Starting at the bottom of the styrofoam cone, take one lollipop and put the stick in the middle of the tissue square making sure not to puncture the tissue, gather the tissue lightly around the stick. Stick the lollipop and tissue into the cone, keep going with more lollipops until the cone is covered. You do not need to put them too close because the tissue paper covers any styrofoam spaces. Once all of the lollipops are in, stick your cutouts in where you want and you're done.)


Sunday, October 5, 2008

GIVING CARDS TO EVERYONE!

To all of you who responded here or on the Cricut MB to my cards, thank you. I would like to give a card to each person who would like one and responded to my blog post from 10/2 - 10/5. Please send your address to randlcorey@verizon.net and I will get a card to you as soon as my little fingers can make them all. Think Pink!

Thursday, October 2, 2008

Breast Cancer Awareness Cards


In honor of Breast Cancer Awareness Month I have made some cards to give away for free- If you would like one, please leave a comment on this post (I will pick at random the winners of the cards). They will come with an envelope all ready for giving. (The embossed cards [white one] have the embossed swirls on one and the "friends" embossing on the other) Great reasons to send one of these cards: someone you know is battling breast cancer, has a new diagnosis, is raising funds for cancer, or you want to thank someone for their support. So many reasons! Enjoy. (Click on the photos for a better view)


Tuesday, September 30, 2008

My First Blog give away
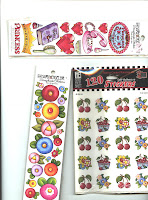

In honor of over 1,000 blog hits I am giving away blog candy. Just leave a comment on this post and I'll pick a name at random. Check back on Thursday for the winner! The candy is Mary Engelbreit stickers. Click the photo for a better view!
AND THE WINNER IS "SPARTANSUS". Thanks for all of your wonderful comments. Please check back often for other great blog entries and giveaways!

Preppy Halloween!


I found these great Halloween graphics in non-traditional colors-in fact PREPPY colors. They were so cool, I had to share them. The .jpg files are in the right hand column.


Friday, September 26, 2008

A way to get credit on your cuts


I used the Cuttin Up font, but you could use any font cartridge, and made a "designed by" cut. I made this as a single design with welding and the nudge buttons, so I can copy it to any file I want. I'll put it in a separate tab when I share a file. This way if someone wants to reference a cut and know who made it, it is right there!

Hogs and Kisses


Just a quick card I made with Animal Kingdom cart. It says "Hogs and Kisses and Birthday Wishes" inside.

Monday, September 22, 2008

Wordle Cards

I've had so much fun with wordle.net, I decided to create wordle cards. Here's what I came up with, the bottoms of the cards are embossed with Cuttlebug folders. Click on the image to see a closer view.


Sunday, September 7, 2008

My Cricut Wordle


Thanks to Capadia from the Cricut message board, I've found this great and so much fun website called Wordle.net. Here is my Cricut Wordle.


Here is how I did it:

On Wordle, type in the words you want to use. If you want a bigger word (like Cricut in my layout), you type it several times, although it only shows up once, the more you type it, the bigger it is). Once you have the font and colors you like (there's lots to play around with), I use a program called Jing - you can download the program for free- to screen capture my picture. I copy and then paste it into Paint. I then use the SELECT tool to create a rectangle and copy only the parts of picture I want. I click copy, then new (say no, you don't want to save the old document), paste into a new Paint document and then save as a JPEG, from there you can share, post on your blog, or whatever... Also another method is that when you download Jing, it will link you up to Screencast.com and your images will go directly there where you will be able to link them directly to your blog with an http address. Hope this is helpful

Cricut Heads Font


I found a great dingbat font from Jeff's Dingbats http://moorstation.org/typoasis/designers/levine/a_e.htm

which look just like the Cricut heads. The font is called "x-terminate". (so you have to click the "S-Z" fonts, it is the 3rd on from the bottom)I thought they were so cute, I had to share. Dingbats are just pictures in place of the normal letters you would type for a true type font. Each letter as well as shifted letters represent a different picture. Clever huh!
*Click on the picture to see a larger view*

Friday, September 5, 2008

I love belts


I love all those fancy buckles and ribbon belts and was inspired by them. There are so many versions of this which could be done. I'm sure it would be adorable too in earth tones with a "leather" belt. Carts used OA, BC and GBS. Cut file is in the right hand column. Enjoy

Attention all Couch Potatoes - Television card
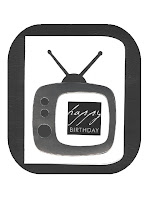

This card is so simple, but would be great for any couch potato in your life. Although you can't see it, the tv screen is a hole in the front of the card. It would also be cute with a "real" picture in the television screen. Carts used: George and Mickey and Friends. Cut file is in the right hand column. (The black background is just contrast paper I used so the white card would show)

Monday, September 1, 2008

PIG out


I have no idea what I would use this card for, but it sure is darn cute, don't ya think?Plus I ate a whole mess of ribs last night - maybe that was my inspiration. Carts used: PDDU George and Celebrations

- also used Cricut markers for outlining
cut file is in the right hand column

Sunday, August 31, 2008

Strawberries are so SWEET


I have been inspired by all of the strawberry ideas I've seen and wanted to try my hand at Strawberry cuts. The berry part is cut with George and I have 2 different stem cuts, one with George and one with Home Accents (as shown inpicture). Both cuts are on the same cut file (in the right hand column). Enjoy

Olive You (I love you) card


I saw this "olive" shape on the Home Accents cart and challenged myself to make a card with it. I used pop dots under the olives to add dimension. Carts used: Cuttin' Up, Home Accents. The cut file is in the right hand column. Enjoy

Thursday, August 28, 2008

Halloween PDDU cuts


Because I love my Paper Dolls Dress Up Cartridge and I love Halloween, I put all of the Halloween cuts on one file so they are easy to find off of the cartridge. To use one of the shapes, simple copy and paste that shape onto a new page.

The .cut file is in the right hand column. Enjoy

Tuesday, August 26, 2008

Butterfly 3D cards


I had fun creating these butterfly cards. They are made with sparkle paper too!. Carts used PDDU and George. Cut file is in the right hand column. Enjoy

Halloween!!


More Halloween cards


Here are some Halloween cards for your inspiration.