Wednesday, January 28, 2009

Framed VINYL Word Art


Just a quick project on a snowy day. I used vinyl on the outside of the frame, and scrapbook paper under the glass (yes, that is paper).

Saturday, January 24, 2009

Framed vinyl


I thought I'd try a new medium besides tiles and plaques. I purchased the frame at the Dollar store. I placed the vinyl on the outside of the glass. I like the look of dimension it gives. Also you could change the background paper whenever you want. I thought it would be a good Valentines present too.

Friday, January 23, 2009

Some more wall plaques


I really like making these wall plaques, they are so simple. They started with a dollar store unfinished pressboard pre-drilled plaque. I just convered it in vinyl and went at it! They are all done in SCAL.
~click on the picture for a better view~


Thursday, January 22, 2009

A new title with circular text


I'm so excited about this tile. I love the circular text. Here is how I did it. ** You need to have a picture editing program on your computer - I use Paint.NET (This is not the Paint Pad Accessory which is on your computer). You can download this free program - you should have this, its great - from `PaintDotNet.com`.
Go to Microsoft Word. Click Insert, Picture, Word Art. Click on one of the plain black styles in the top row. Type in the text you want. Click OK. Click once on your text. The Word Art box will appear. Click the "A" which looks italic. (It's in the middle of the toolbar). Click on the circle icon. Now drag the lower right corner toward the left until it is the shape desired. Now right click on your image, and click on Format Word Art. In the Layout Tab choose "In Front of Text". Then OK. Now right click again and click Copy.
Open Paint.net. Click Edit, Paste - then Expand Canvas. Now you can save your file. Click File, Save as - make sure to change the file type to .jpg. Now you can use Inkscape and SCAL to cut this image.
Let mek now what you think!


~click the picture for a better view~


Monday, January 19, 2009

From Ugly Duckling to Cute Wall Plaque


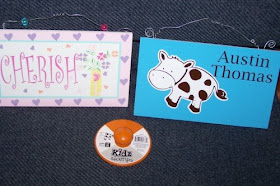
It's not a tile, but a wall plaque. I found these super ugly plaques at Michaels for .40 each. So my mind started to spin and I knew I could vinyl it. I covered it in vinyl and trimmed closely with a razor blade and then decorated. I used the image from KIDZ stamps available at Michaels also. Converted stamped image in Inkscape and then to SCAL.

~click photo for a closer look~

Friday, January 16, 2009

My newest Tile!


I really like this design and saying...


-Click on the photo for a better view~

Wednesday, January 14, 2009

My Valentine Plate


Just another vinyl project. I used the font "Hole Hearted" and put the heart cut outs from the letters in the middle of the plate. It can't be washed, but I'm sure it can be wiped down, no problem.

Saturday, January 10, 2009

I love colored vinyl stickers


Found these colored vinyl stickers and I love them in conjunction with my Cricut cuts. It is a great way to add dimension to tiles and projects. Click on a picture to get a bigger and better view!


Wednesday, January 7, 2009

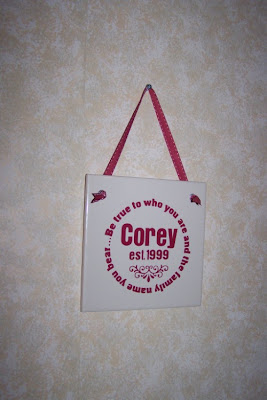
Tiles, Tiles, Tiles


I've been busy creating tiles with vinyl. My poor Cricut hasn't cut paper in weeks! Here are some tips for making tiles. Tiles can be purchased at any home improvement store very cheap. You can drill holes in the tiles with a masonry bit and power drill. Drill from the back and put masking tape on the front of the tile where the holes will be. Gromets provide a nice finish to the drilled holes. A 1/2" gromet fits tightly into a 1/4" hole (go figure). Tiles hang nicer when the ribbon comes from the back (like the "Home" tile") rather than the front (like the "Sweet Pea" tile). You can use shank buttons for a great look - see Home and Corey tiles. Insert the ribbon from the back to the front of the tile, Fold the ribbon so you get a "tip" to the ribbon. Sew it very well to the shank button and then pull it back through the hole. Good luck.